sombrero cake!
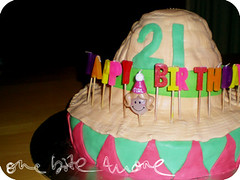 Hola Amigos! It was the Bean's Birthday in my period of semi-absence and a party was being had. A Mexican Fiesta to be precise. And, as part of my sisterly duties, I was commissioned to make a cake. "We're having forty... oh, maybe fifty people" said the Bean, some three weeks prior. And then, "It may be closer to sixty. I'm not sure" said the Bean, one week prior. And there were dinners to be had and people to be seen with and so the cake was made on a Tuesday and decorated on a Saturday morning in amongst pots of beans and mince and lentils and rice.
"What kind of cake would you like to have?" I asked. "Marble Cake" she responded. "Are you sure?" I had asked, hoping she would change her mind. But she didn't. And I ws left to come up with a way to make marble cake Mexican. There were thoughts of a 2D cactus, but I wanted something more... challenging? Did I really? Well somewhere in between the question and the outcome I decided I did. And oh! The Bean was so excited! And oh! So were the Mexican drug ring, the poncho & sombrero clad muchachos, the cactus, the taco & the various mariachi musicians.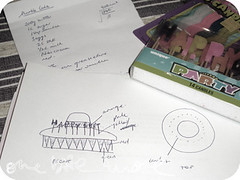
the plans, oh! the plans!
ingredients:
600g butter
3C sugar
9 eggs
4C Self Raising Flour
2C Plain Flour
375ml milk
3 tbs cocoa powder
red & green food colouring
method:
1. Beat the butter & sugar until it is smooth and pale in colour. With this much batter, it may be wise to do this section in batches. I did not and ended up with sugar coated butter flying around my kitchen. I only exaggerate a little bit.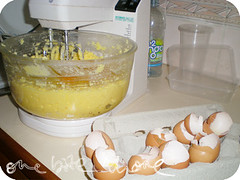
butter & sugar first. then eggs. now beat it.
3. Transfer the entire amount into a bigger bowl now. (Again, I did not do this and ended up with flour all over my kitchen. Exaggeration? Slight.)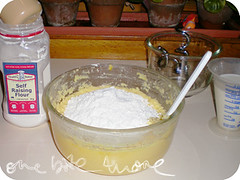
flour, then milk, then flour, then...
5. Pour about 125ml of the milk into the mix. There is only one kind of milk in this recipe so no confusion there right? Mix that in now. The mix will loosen a little bit. This is a good thing.
6. Repeat steps 4 & 5 until all of the flour and all of the milk has been mixed through.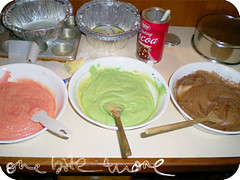
colour me happy baby!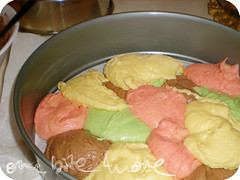
dollops of batter
[8a: for those planning on sombrero cake-ing it up, I used a 28cm round springform for the base and a disposable aluminium deep pie dish for the peak.]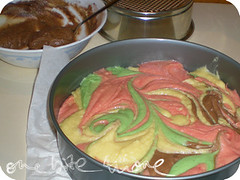
swirl-er-riffic!
10. Now baking time. It'll take about an hour and a half in a 180C oven. Check for cookedness by inserting a skewer. If it comes out clean, the cake is done. If the top is browning too much, cover it with tin foil and keep baking.
11. You'll have enough batter left over for some cupcakes. These are best eaten straight from the oven and slathered with nutella. I may or may not know this from experience.
leftover batter cupcakes
making a sombrero cake
ingredients:
one packet of roll out icing (500g)
powder (not liquid) colouring in yellow, orange, green & red
300ml cream
2 tbs icing sugar
equipment:
greaseproof paper
spatula
knife
rolling pin
method:
1. It's best if you make your cake the night before. Once it's cooked, let it cool then wrap it in layers of glad wrap & foil and pop it in the freezer overnight.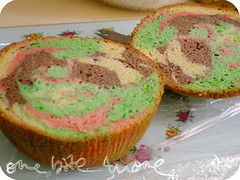
making the hat's "peak"
3. The cake baked in a pie dish will have risen ridiculously and have a massively curved up top. Slice the peaked bit off (carefully though! We'll be using it!) You should now have a round cake, a cake that looks like a cone with the top missing, and the peak of the pie dish cake.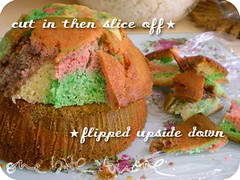
making a peak (part 2)
5. Now whip your cream and sugar together until it is stiff (but without being too aerated. This is going to be your icing "glue".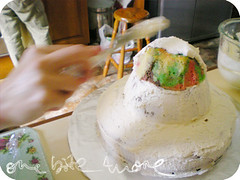
laying down the glue
7. Colour about 100g of the icing green and 100g of the icing red using the powder colouring. Keep working it through until the colour is evenly spread.
applying the outer layer of icing
9. Roll out a rectangle of red, half as long as the green and cut triangles out from it as shown in the picture. Stick these onto the green with a little bit of pressure. You won't need an adhesive as such.
10. Finally, add yellow & orange to the rest of the icing until it is straw coloured
(or sort of straw coloured). Roll that out into a big, BIG circle and drape it over the top of the cake. Trim the edges and use a skewer to create some detail.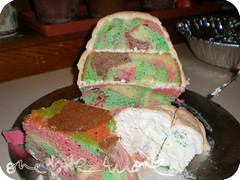
cakey innards (hooray for swirls!)
12 bites more:
wow. very impressive! bean is lucky to have you :)
Labels: baking, dessert, recipes
very cute and nicely done!
Labels: baking, dessert, recipes
Shez that cake is packed full of AWESOMENESS! Totally worth all the hours of stress :) The whole Mexican theme sounds like so much fun!
Labels: baking, dessert, recipes
Very cool idea and nicely executed!
Labels: baking, dessert, recipes
hehe looks so cool. i want one!
s :-)
Labels: baking, dessert, recipes
Warm from the oven with nutella sounds like the perfect way to eat cake to me! The marbling looks superb, and I love the way you decorated the sombrero.
Labels: baking, dessert, recipes
HAHA 'higgeldy piggeldy'yummmy marbling mmmmm. You should had made Bean wear it before cutting!
Labels: baking, dessert, recipes
Oh, this was the triple "oh!" cake I've overheard you talking about.
Great work with the cake senorita. Good luck with next year's attempt :)
Labels: baking, dessert, recipes
Hey you have the same benchtop mixer as I do!! Haha aren't they just awesomely retro? Although I think its time I modernise my mixer.
Looks goooooooood yummmm.
Labels: baking, dessert, recipes
betty: thanks (and oh does she know it! hehehe)
Helen: thanks dude :)
Stephcookie: oh it was! so so much fun. and aided in no small way by the rummy punch!
Lorraine: thankyou!
Simon: *grins*
Arwen: oh i know right? its the melting that does it for me. yummo :)
FFichiban: heh. that would've looked CRAZY!
Simon: it sure was! (and thanks dude, though i think 22 will be a smaller do than 21)
karen: ours is a donation after we blew up the last one. it is great though. love the timer feature on it.
Labels: baking, dessert, recipes
How cute that looks!!
Came to think of birthday cakes, I don't think I ever had such creative cakes before.
Labels: baking, dessert, recipes
Festive! What a great idea, having a Mexican themed celebration.
Labels: baking, dessert, recipes
Post a Comment